A leaking hose bib can strike at any time but is even more likely during the winter when freezing temps arrive. If you look outside and notice dripping from your outdoor faucet, it may be time to call a plumber. Let’s take a look at what causes hose bib leaks, if a DIY repair is possible, and why you should take these leaks seriously.
Why is My Hose Bib Leaking?
A hose bib, also known as an outdoor faucet or spigot, may leak for several reasons, including:
- Worn out washer: The rubber washer inside the hose bib can wear out over time, causing water to leak from the spout. This is a common issue and can be easily fixed by replacing the washer. You can find these washers at most stores like Home Depot and, of course, they’re even on Amazon. They’re fairly simple to replace yourself.
- Loose packing nut: The packing nut, which is located just below the handle, can become loose and cause water to leak from the hose bib. Tightening the packing nut can solve this problem. This is an easy fix for someone who is handy with a wrench.
- Cracked or damaged pipe: If the pipe leading to the hose bib is cracked or damaged, water can leak from the spout. This may require the assistance of a plumber to repair.
- Corroded valve seat: The valve seat, which is located inside the hose bib, can become corroded and cause water to leak. In this case, the hose bib may need to be replaced.
- Freezing temperatures: In colder climates, water left inside the hose bib can freeze and cause the faucet to leak when it thaws. To prevent this, it’s important to properly winterize your outdoor faucets by turning off the water supply and draining any remaining water from the hose bib.
- Improper installation: If the hose bib was not installed correctly, it may not be able to properly hold back water pressure, causing it to leak. In this case, it may need to be re-installed by a professional plumber.
Do I Need to Fix a Leaking Hose Bib Right Away?
 A small drip may not seem like a big deal, but it is important to fix a spigot leak as soon as possible. Ignoring a leaking hose bib can lead to several problems such as:
Water damage: A leaking hose bib can cause water to seep into your home’s walls, foundation, or basement, causing damage and potentially leading to mold growth.
Wasted water: A leaking hose bib can waste a significant amount of water, leading to higher water bills and wasting a valuable resource.
Reduced water pressure: A leaking hose bib can also reduce the water pressure in your home, making it difficult to use your faucets, shower, or appliances that require water.
Damage to the hose bib: Over time, a leaking hose bib can cause damage to the fixture itself, requiring more extensive repairs or replacement.
How to Fix a Hose Bib
The most common reason an outdoor faucet is leaking is due to a worn-out washer or O-Ring. To fix this yourself you can follow these steps:
- Turn off the water supply: Locate the main water valve for your house or the valve specifically for the outdoor faucet. Turn it off to stop the water flow and prevent any further leakage.
- Drain the water: Open the hose bib to release any remaining water in the line. This step helps minimize water spillage when you start repairing the leak.
- Gather the necessary tools: You’ll need a few basic tools for this repair, including an adjustable wrench, a screwdriver (usually a Phillips or flathead), and plumber’s tape or thread seal tape.
- Remove the handle or knob: Most hose bibs have a handle or knob that you need to remove to access the internal components. Use a screwdriver to loosen and remove any screws holding it in place. Once the handle or knob is loose, pull it straight off the stem.
- Inspect the stem and packing nut: With the handle or knob removed, you’ll see the stem and a packing nut surrounding it. Check for any visible damage or wear. If you notice any cracks or significant wear, you may need to replace the entire hose bib.
- Tighten the packing nut: Use an adjustable wrench to tighten the packing nut slightly. This may help compress the packing material around the stem and reduce or eliminate the leak. Be careful not to overtighten, as it can damage the components.
- Replace the washer or O-ring: Remove the old washer or O-ring from the stem. Take it to a hardware store to find a matching replacement. Install the new washer or O-ring onto the stem.
- Apply plumber’s tape: Wrap a few layers of plumber’s tape or thread seal tape clockwise around the stem’s threaded portion. This helps create a tight seal when you reattach the handle or knob.
- Reassemble the faucet: Slide the handle or knob back onto the stem, aligning it with the appropriate position (usually “off” when fully tightened). Use the screwdriver to secure the handle or knob in place with the screws.
- Turn on the water supply: Once you’ve reassembled the faucet, turn on the water supply slowly. Check for any leaks around the hose bib. If there are no leaks, you have successfully fixed the problem.
Remember to monitor the hose bib for a little while after the repair to ensure that the leakage has been resolved completely. If the problem persists or you encounter difficulties during the repair process, it’s advisable to seek assistance from a professional plumber.
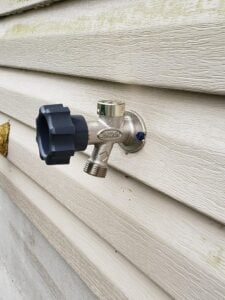
Outdoor Spigot Replacement
You may decide your hose bib is beyond repair (maybe it froze and has cracked due to forgetting to shut off the water) or you’d like a nicer looking, frost-proof version. With this types of hose bib, you do not have to worry if you forget to turn the water off in the winter. A shut-off valve inside protects water from building up and freezing in the pipe. Hose bib replacement is always an option but is more expensive than repairing your current spigot.
Need a plumber?
Quality Comfort Home Services is proud to offer full-service plumbing maintenance and repairs all over southwest Ohio. You can book service online anytime or give us a call at 513-620-4822.